Archive for the ‘PID’ Category

Improving the Beginner’s PID – Sample Time

Friday, April 15th, 2011

(This is Modification #1 in a larger series on writing a solid PID algorithm)

The Problem

The Beginner’s PID is designed to be called irregularly. This causes 2 issues:

  • You don’t get consistent behavior from the PID, since sometimes it’s called frequently and sometimes it’s not.
  • You need to do extra math computing the derivative and integral, since they’re both dependent on the change in time.

The Solution

Ensure that the PID is called at a regular interval. The way I’ve decided to do this is to specify that the compute function get called every cycle. based on a pre-determined Sample Time, the PID decides if it should compute or return immediately.

Once we know that the PID is being evaluated at a constant interval, the derivative and integral calculations can also be simplified. Bonus!

The Code

/*working variables*/
unsigned long lastTime;
double Input, Output, Setpoint;
double errSum, lastErr;
double kp, ki, kd;
int SampleTime = 1000; //1 sec
void Compute()
{
   unsigned long now = millis();
   int timeChange = (now - lastTime);
   if(timeChange>=SampleTime)
   {
      /*Compute all the working error variables*/
      double error = Setpoint - Input;
      errSum += error;
      double dErr = (error - lastErr);

      /*Compute PID Output*/
      Output = kp * error + ki * errSum + kd * dErr;

      /*Remember some variables for next time*/
      lastErr = error;
      lastTime = now;
   }
}

void SetTunings(double Kp, double Ki, double Kd)
{
  double SampleTimeInSec = ((double)SampleTime)/1000;
   kp = Kp;
   ki = Ki * SampleTimeInSec;
   kd = Kd / SampleTimeInSec;
}

void SetSampleTime(int NewSampleTime)
{
   if (NewSampleTime > 0)
   {
      double ratio  = (double)NewSampleTime
                      / (double)SampleTime;
      ki *= ratio;
      kd /= ratio;
      SampleTime = (unsigned long)NewSampleTime;
   }
}

On lines 10&11, the algorithm now decides for itself if it’s time to calculate. Also, because we now KNOW that it’s going to be the same time between samples, we don’t need to constantly multiply by time change. We can merely adjust the Ki and Kd appropriately (lines 31 & 32) and result is mathematically equivalent, but more efficient.

one little wrinkle with doing it this way though though. if the user decides to change the sample time during operation, the Ki and Kd will need to be re-tweaked to reflect this new change. that’s what lines 39-42 are all about.

Also Note that I convert the sample time to Seconds on line 29. Strictly speaking this isn’t necessary, but allows the user to enter Ki and Kd in units of 1/sec and s, rather than 1/mS and mS.

The Results

the changes above do 3 things for us

  1. Regardless of how frequently Compute() is called, the PID algorithm will be evaluated at a regular interval [Line 11]
  2. Because of the time subtraction [Line 10] there will be no issues when millis() wraps back to 0. That only happens every 55 days, but we’re going for bulletproof remember?
  3. We don’t need to multiply and divide by the timechange anymore. Since it’s a constant we’re able to move it from the compute code [lines 15+16] and lump it in with the tuning constants [lines 31+32]. Mathematically it works out the same, but it saves a multiplication and a division every time the PID is evaluated

Side note about interrupts

If this PID is going into a microcontroller, a very good argument can be made for using an interrupt. SetSampleTime sets the interrupt frequency, then Compute gets called when it’s time. There would be no need, in that case, for lines 9-12, 23, and 24. If you plan on doing this with your PID implentation, go for it! Keep reading this series though. You’ll hopefully still get some benefit from the modifications that follow.
There are three reasons I didn’t use interrupts

  1. As far as this series is concerned, not everyone will be able to use interrupts.
  2. Things would get tricky if you wanted it implement many PID controllers at the same time.
  3. If I’m honest, it didn’t occur to me. Jimmie Rodgers suggested it while proof-reading the series for me. I may decide to use interrupts in future versions of the PID library.

Next >>

Creative Commons License

flattr this!

Improving the Beginner’s PID – Introduction

Friday, April 15th, 2011

In conjunction with the release of the new Arduino PID Library I’ve decided to release this series of posts. The last library, while solid, didn’t really come with any code explanation. This time around the plan is to explain in great detail why the code is the way it is. I’m hoping this will be of use to two groups of people:

  • People directly interested in what’s going on inside the Arduino PID library will get a detailed explanation.
  • Anyone writing their own PID algorithm can take a look at how I did things and borrow whatever they like.

It’s going to be a tough slog, but I think I found a not-too-painful way to explain my code.  I’m going to start with what I call “The Beginner’s PID.”  I’ll then improve it step-by-step until we’re left with an efficient, robust pid algorithm.

The Beginner’s PID

Here’s the PID equation as everyone first learns it:

This leads pretty much everyone to write the following PID controller:

/*working variables*/
unsigned long lastTime;
double Input, Output, Setpoint;
double errSum, lastErr;
double kp, ki, kd;
void Compute()
{
   /*How long since we last calculated*/
   unsigned long now = millis();
   double timeChange = (double)(now - lastTime);
 
   /*Compute all the working error variables*/
   double error = Setpoint - Input;
   errSum += (error * timeChange);
   double dErr = (error - lastErr) / timeChange;
 
   /*Compute PID Output*/
   Output = kp * error + ki * errSum + kd * dErr;
 
   /*Remember some variables for next time*/
   lastErr = error;
   lastTime = now;
}
 
void SetTunings(double Kp, double Ki, double Kd)
{
   kp = Kp;
   ki = Ki;
   kd = Kd;
}

Compute() is called either regularly or irregularly, and it works pretty well. This series isn’t about “works pretty well” though. If we’re going to turn this code into something on par with industrial PID controllers, we’ll have to address a few things:

  1. Sample Time – The PID algorithm functions best if it is evaluated at a regular interval. If the algorithm is aware of this interval, we can also simplify some of the internal math.
  2. Derivative Kick – Not the biggest deal, but easy to get rid of, so we’re going to do just that.
  3. On-The-Fly Tuning Changes – A good PID algorithm is one where tuning parameters can be changed without jolting the internal workings.
  4. Reset Windup Mitigation –We’ll go into what Reset Windup is, and implement a solution with side benefits
  5. On/Off (Auto/Manual) – In most applications, there is a desire to sometimes turn off the PID controller and adjust the output by hand, without the controller interfering
  6. Initialization – When the controller first turns on, we want a “bumpless transfer.” That is, we don’t want the output to suddenly jerk to some new value
  7. Controller Direction – This last one isn’t a change in the name of robustness per se. it’s designed to ensure that the user enters tuning parameters with the correct sign.
  8. NEW: Proportional on Measurement – Adding this feature makes it easier to control certain types of processes

Once we’ve addressed all these issues, we’ll have a solid PID algorithm. We’ll also, not coincidentally, have the code that’s being used in the lastest version of the Arduino PID Library. So whether you’re trying to write your own algorithm, or trying to understand what’s going on inside the PID library, I hope this helps you out. Let’s get started.
Next >>

UPDATE: In all the code examples I’m using doubles. On the Arduino, a double is the same as a float (single precision.) True double precision is WAY overkill for PID. If the language you’re using does true double precision, I’d recommend changing all doubles to floats.

Creative Commons License

flattr this!

PID Library ported to mbed

Tuesday, July 27th, 2010

mbed pid

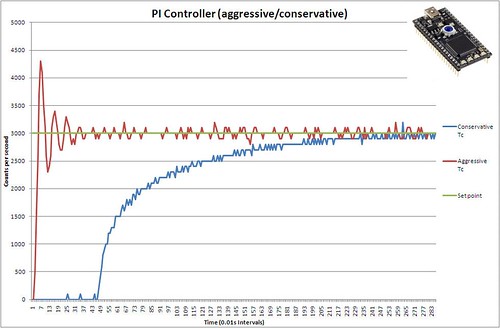
So the guys over at ARM took the arduino pid library and ported it for use with their mbed platform.  Nice little stroke to the ego there.  That’s not the main reason I’m excited though.   Because they’re a legit company,  they have written documentation.

I’m terrible at documentation.  Commenting my code is hard enough.  Writing clear, concise, well-thought-out help files?  I’m as useless as 1000 drunk monkeys with typewriters.

It’s always been nagging at me that the Arduino PID Library didn’t have a clear help document. Now, indirectly, it does. Since the backend is the same, everything they say about the mbed library works with the Arduino library as well.

flattr this!

PID Front-End v0.2

Saturday, July 4th, 2009

PID_FrontEnd_v02

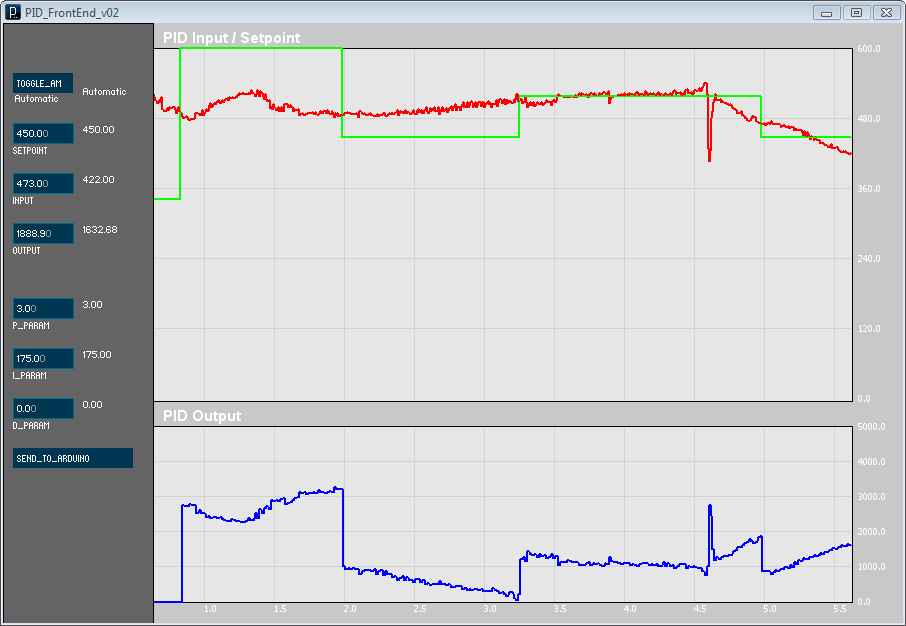
Some people spend the 4th of July relaxing with friends, drinking beer, enjoying some good weather. I… updated the pid front-end. I got several requests to add grid lines and axes, and now was the time. For those of you with an image of me in a dank basement coding away, fear not. There was a Hawaiian shirt and a hammock involved.

The picture says it all. The trend lines are a little thicker, and there are now axis labels and grid lines. It’s also worth noting, since it was a pain to code, that the time gridlines and labels scroll, and can be displayed in milliseconds, seconds or minutes.

It can be downloaded here.

flattr this!

Graphical Front-End for the Arduino PID Library

Saturday, May 30th, 2009

PID_FrontEnd_Explained

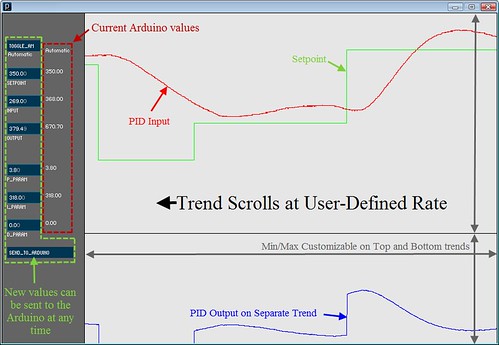
The first (extreme beta) version of the PID Front-End is up on the pid library page. It makes adjusting an Arduino PID much, much easier. The download includes the processing sketch (of course.) It also has an Arduino sketch showing how to send/receive on that end.

Links:
Download UPDATE: Download
PID Library Page
Arduino Forum Thread

flattr this!