Archive for the ‘Craft’ Category

My adventures in Silksceening – Part 1

Friday, September 21st, 2012

The Motivation

It’s nice to have a souvenir when I come back from vacation: a shot glass, a knick-knack, a T-shirt; a little reminder helps the trip last longer in my mind.

On my last vacation, I realized how much buying souvenirs grates on my diy sensibilites. I wanted a T-Shirt, but I didn’t want what they were selling. I wanted something simple. I wanted the design I had unconsciously completed in my head.

Something clicked. I decided that instead spending $20 on a $5 cookie-cutter T-shirt, I would make my own shirt as soon as I got home.
(more…)

flattr this!

Knitting

Friday, March 2nd, 2012


It’s been a busy few months.  Between the osPID and my day job, it’s been pretty hectic.  Somehow, in the middle of it all, I decided to learn how to knit.
(more…)

flattr this!

Collapsible Knitting Needle

Sunday, January 22nd, 2012

I needed a break. I’ve been working hard on the osPID for several months, and I just needed to not look at code or control algorithms for a little bit. Nothing says “break” like an out-of-left-field project.


I only started knitting recently. Something that’s been bothering me about it is the length of the needles. They’re 14″ long, and I’ve been worried they’ll be bent while riding in my backpack.

It occurred to me that some sort of collapsible needle might be useful in this situation. Taking my inspiration from elastic tent poles, I got to work on my “not PID” project.
(more…)

flattr this!

When a Maker Gets Married

Monday, August 15th, 2011


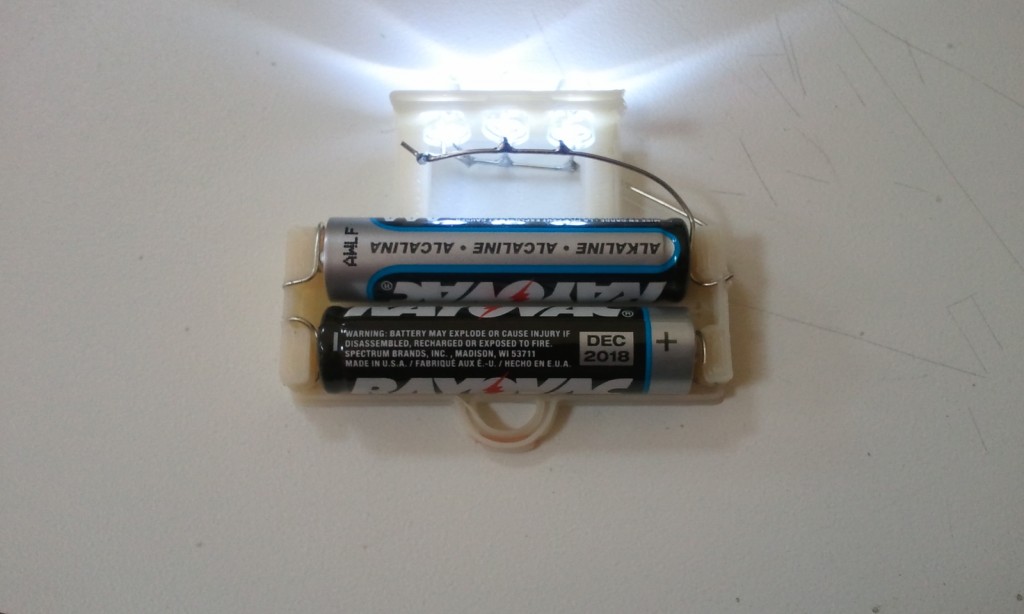
I got married a couple of weeks ago. We did all the planning / decoration ourselves. By we, or course, I mean my wife. One of the things she wanted to do was have paper lanterns suspended above the tables.

The initial plan was to use throwies, but I felt they wouldn’t give as much light as a commercial 3 LED solution. This led me to a fun, albeit time consuming project.
(more…)

flattr this!

Sandal Retread using Fillet ‘o Tire

Sunday, August 2nd, 2009

Sandals After

I did this once years ago, and it worked really well. Take an old tire, and recycle it to make indestructible shoe soles. Tire tread is designed to handle way more abuse than simple walking can dish out. My current sandals were starting to wear down, and it was time to do it again.

There’s just one issue when using a tire: there’s a steel mesh embedded in the rubber. It rigidly holds a curved shape, which is not what you want. The solution I came up with was to fillet the tire, keeping the tread and leaving the steel behind. Good stuff.

Beyond that it’s a straight-forward process. You remove the old soles and glue the new ones on. The rest of my sandals will fall apart long before the soles do.

I took a bunch of pictures. Should make for a decent Instructable.

flattr this!

Holy Crap I Made Cheese

Thursday, July 2nd, 2009

done

That’s right. Cheese. I was surprised by how easy it was.  It was just a simple farmer’s cheese, but still.  Making cheese is one of those things you just assume is impossible; for professionals only.  Turns out people have been making it for a long time, with tools far cruder than what we have today.  Who knew?

This could probably be an Instructable, but I’m not an expert, and I’d hate to inadvertently lead someone astray.  This is what worked for me, your results may vary.

So let’s get down to it.  I used this recipe / procedure.  Other than grossly over-specifying the amount of salt needed, it was easy to follow and gave good results.

Step 1: Heat the Milk

pre-addition

The recipe says something like “Slowly heat” until “about 180,” stirring “often.” I approached these statements with the meticulousness of an engineer doing something for the first time. First of all… ABOUT 180? No way. Digital thermometer. As far as slowly, I put the stove on low, and got a heat rate of 5-10 degrees/min. I rounded out the overkill trio by deciding to stir every 20 degrees. I’ve since made cheese again, have been more lax, and it still came out fine. (I still use the thermometer though.)

Step 2: Curdle the Milk

curds

Once the milk was at temperature, buttermilk and vinegar were added. Lowering the pH of the system causes the solids in the milk to want to separate. I think. This will happen at any temperature, but it’s amazing how quickly it starts when you’re at 180 degrees.

Step 3: Strain

cheese clothdrain1
drain3drain4

After about 10 minutes, it’s assumed that all the solids that are going to curdle have curdled. Time to get them out of there! Using cheese cloth and a strainer (for support,) I was able to keep the curds and dump the whey. Yes. Curds and whey. This is where that comes from. Why Miss Muffet would want to eat whey is beyond me. The curds are tasty though.

Step 4: ENJOY

enjoy

The last step is to salt to taste. I used 1/4 tsp. That’s it. Serve in the recipe of your choice. In the picture above it’s mixed with tomato, olive oil and basil. Delicious. It also works really well in mashed potatoes. The cheese apparently lasts for 5 days in the fridge, but it’s been gone after two days both the times that I’ve made it. 

I can’t stress how easy this was.  While it takes around 1:30 from start to finish, more than an hour of that is time where you can do something else.  Totally worth it! 

The next step for me is to make “real” cheese.  That means renet, and aging. At least I think that’s what it means.

flattr this!